
* GadgetBuilder.com * © 2018 by John Moran
Last Modified:
Click to Enlarge
My shop is a 12x14 area walled off in the basement to include the furnace so it is comfortable in Connecticut winters. The picture above shows my minilathe bench - clearly, I like all my commonly used tools at my fingertips. I find this less-than-tidy setup convenient for the projects that I undertake. Things have changed a bit over time, of course.
The riser under the mini-lathe brings the cross slide just above my elbow, a convenient working height, while providing a place for common tools in holes bored into the 2x4s comprising its frame. The lathe is not bolted to the riser so it is easy to move it when the need arises. The aluminum sheet beneath the riser aids cleaning up errant chips and minimizes oil seeping into the bench.
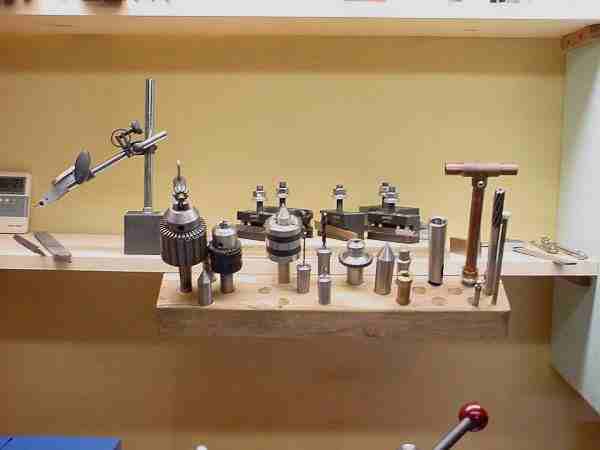 I frequently use the tailstock so the taper tools are in a rack above the lathe for easy access. The toolholders for the QCTP are also just above the lathe for easy access, along with calipers and DTI. The Jacobs Superchuck overbalances the minilathe's tailstock so it is used only for tapping and similar chores where its exceptional grip is needed. Not shown is a keyless chuck I now use for most things.
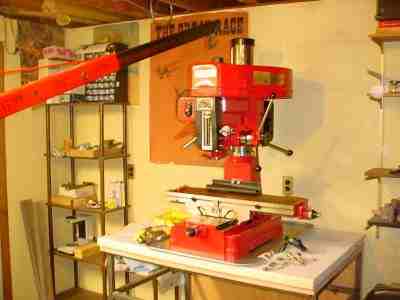
I purchased a mill in March '04; another Homier product (wish it were blue to match the lathe). 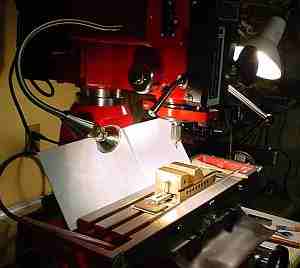 I added a gooseneck light plus a chip shield on the front. The white plastic pieces and similar clear plastic pieces on the front (hard to see because the edge is toward the camera) help to control swarf and make cleanup easier.
I Purchased a Rockwell 10" lathe in March '07 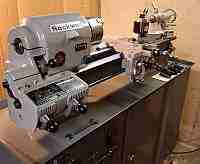 and spent a couple months working on it to get it back into reasonable shape.
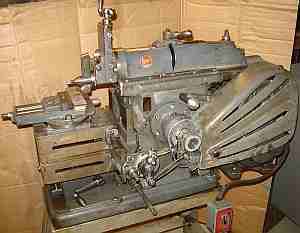 In November '07 I purchased an Atlas 7B shaper; this instigated walling off more of the cellar to expand my shop.
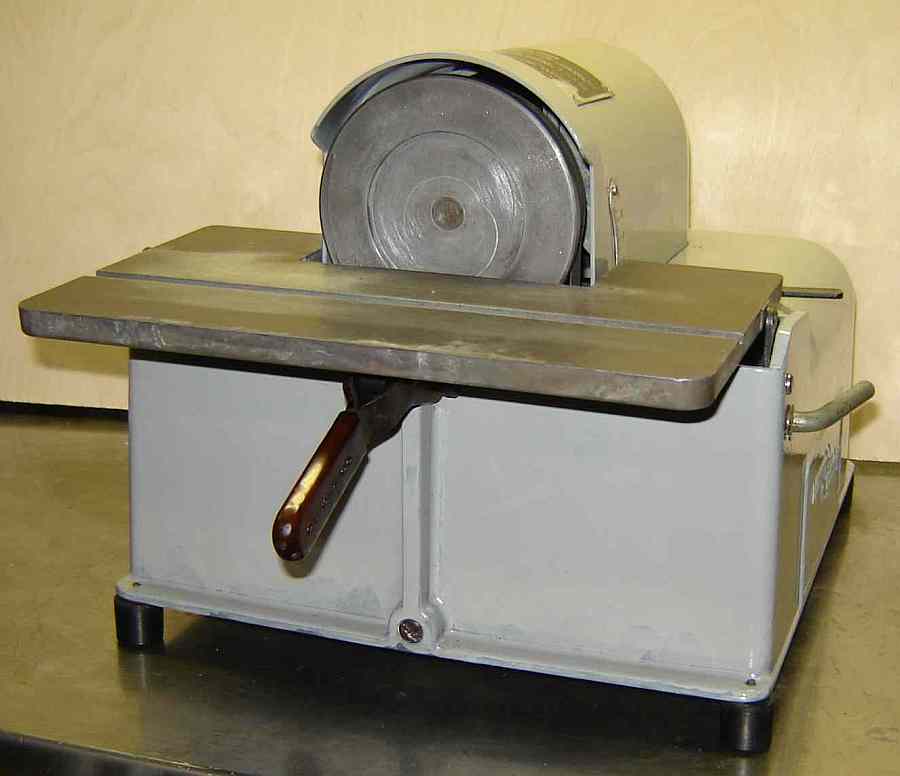 This Leonard Grind-R-Lap was added in October 2009, a generous gift from a friend whose similar machine I had admired on visits to his shop.
I'm not a machinist, simply a gadget builder willing to share things which work for me and might (or might not) be useful to others... Most all the simple projects (especially the minilathe mods) shown on this site can be built from the information provided; a few projects, e.g. the Brooks-Stent, need the plans to complete. Occasionally readers would like to purchase one of my projects but I'm too slow at machining to be able to copy and sell my work at reasonable cost.
I often use a blue Sharpie pen in place of machinist blue; for small things it is quick, convenient, and I make less of a mess using it. Sharpie works better than most that I've tried; I have read that markers for whiteboards work well but haven't tried them.
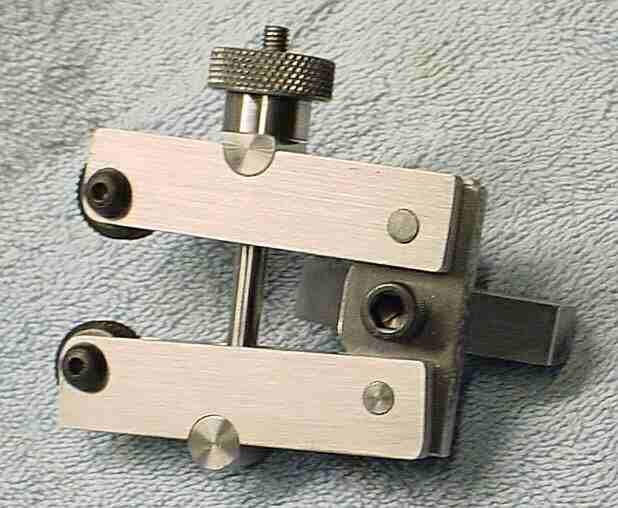
A DTI is amazingly versatile and surprisingly rugged. A magnetic stand is often helpful when using the DTI. After making a DTI holder to fit the QCTP I got a second DTI so I could leave one in the magnetic stand and the other in the QCTP holder.
The inexpensive magnetic stand with fine adjust works much better since I "adjusted" it. The clamps that go around the bars need to be tweaked so they lock with only a small force from the locking screw; adjust by squeezing the clamp carefully in a vise, and checking until it works properly - if you go too far, wedge it open with a flat blade screwdriver and try again.
Odd leg calipers are very handy for marking out. An optical center punch is helpful in getting the mark exactly where desired.
A straight fine knurl can increase the diameter of an unhardened pin. I often use 1/8 or 1/4 drill rod as pins, reaming with a standard reamer and increasing the pin size on one end before pressing it in (hardening if needed). The pins holding the knurler arms are an example (the knurl is visible if you look for it).
A granite surface is nice for layout and also for assembly, where its smooth surface doesn't scratch finished work. I got a sink cutout free at a granite countertop vendor.
It is possible to unwittingly use the 3 jaw chuck on materials which exceed its capacity; one possibility is a jaw could release and depart along with the work. I located the point where the #1 jaw releases from the scroll and marked (Sharpie) the chuck where the 45 degree angle on the inner part of the jaw meets the chuck face. I then removed the jaws and used the corner of the cutoff tool (set at 45 degrees to the chuck) to scribe a circle on the chuck face at the marked diameter, turning the chuck by hand. This circle was filled with ink and serves as a reminder to check jaw engagement when near the circle.
Since making the tangential toolholder for my QCTP, the tangential has become my most used cutter - probably because it cuts better for most materials. It is easy to sharpen so I keep it in top shape - one reason it cuts so well.
A simple way to improve finish on work is to use a vertical shear bit. This tool is easier to grind than normal tool shapes because it is simple and it is easy to use because vertical position is not critical, as it is with most tools.
I use the cutoff tool for some unconventional applications. It is useful for finishing inside corners which need to be sharp. And, I sometimes use it for regular turning because it produces a good finish with some materials. Perhaps its best feature is that it is so easy to sharpen that it is always kept sharp.
Carbide tools tend to chip and generally be difficult to keep sharp; I find HSS much more forgiving on the 7x12. The Rockwell seems to like carbide tooling - carbide doesn't chip there as it does in the 7x12.
Cobalt drills work really well. I have an ancient set of HF drills and replace the worn out ones with cobalt, preferably M42, so now the frequently used bits are better quality.
I occasionally snap the tip off a small center drill and need to remove it. A 1/8" masonry drill, the type with a carbide tip, can be sharpened on a diamond hone so it will do the job - doesn't cut quickly but it works. Spotting drills work better than center drills in getting a hole started where desired... and the tip never breaks off :-)
A muffin pan with 12 cups is helpful in holding and organizing small parts during disassembly and assembly.
I dismantle discarded line printers and VCRs for their parts, mostly the shafts and ball bearings. In addition, I keep the various small springs they contain because they are often useful. The carbide disk for the Dremel cuts springs to length nicely. Printer shafts turn nicely, almost as well as 12L14.
Plumber's cutting oil from the hardware store works OK on steel but is surprisingly expensive. I finally bought Accu-Lube 2000 and like it much better(it doesn't smoke). Accu-lube is used very sparingly so a gallon is more than a lifetime supply in the home shop; it is also available from MSC in an 8oz container, several year's worth for most home shops. Best method I've found for application is the A-West needle bottle, OD=0.035/white. (Avoid Accu-Lube Synth, it damaged the paint on both of my lathes.) WD-40 works well on aluminum, especially for tapping. I tried vegetable oil for cutting - it works OK but afterward dries to a film on the machine and makes a mess so I now avoid it.
Some shop work (e.g. cleaning used equipment after purchase) gets one's hands very dirty. If I know beforehand I use a glycerol based hand cream; this fills the pores so grease can't - it's important to work some under the fingernails too. It doesn't take much, a chunk about the size of a bean, and it isn't slippery after application. Afterwards, the grease (and glycerol) washes off easily with soap and water, the key being that glycerol is water soluble but not oil soluble. The least expensive version I've found is Series 8 barrier cream.
The Pit Bull drill sharpener works acceptably for drills 1/8 inch and up, it's often found at $10 to $15. It takes a little practice and fiddling so learn on some of those junk bits that are in everyone's "too good to throw out but not good enough to use" box. One drawback: it can't produce split points.
A bench sander works well to provide a pleasing finish to some items made in the shop. It's also useful for final fitting of some flat items and for breaking sharp corners. Of course, it removes rust from scrap quickly. Also useful for grinding lathe and fly cutter bits to approximate (or final) shape. I generally use an 80 grit belt on my 4x36 sander.
Sketchup is a nice free CAD program. It has 3D capability which I used on my drill sharpener to figure out how to avoid interference. It has extensive help built in plus the book "Google Sketchup" (bought used) was a big help.
"True Blue" paint by America's Best, a Rust-Oleum company, is a pretty good match for my Homier 7x12; it is available at Home Depot and elsewhere.
My lathe's spindle has a registration shoulder which is a couple of thou under size. Initially I found this to be a problem because the chuck registration was often off slightly, causing the chuck to have some runout. Now, I think this is a feature: I barely tighten the chuck bolts then indicate on a hardened rod held in the chuck. Bumping the chuck in the appropriate direction with a rubber mallet allows adjusting the runout to a half thou or better in a minute or so, then I tighten the bolts down. Now that I've tried it, if I got a minilathe where the chuck fit correctly I would enlarge the opening in the chuck by a thou or two (using protection when gripping the 3 jaw's body in the 4 jaw to avoid marring the finish) so I could use this technique (Bump-Tru, the poor man's Set-Tru substitute). That big rubber mallet on my pegboard actually is used for precision adjustments ;-) Bump-Tru is used in my ER-32 collet chuck to accommodate a poor quality collet set. Before trying Bump-Tru there are some simpler things to try.
Carbide inserts seem like a slick way to use canned tool shapes without having to learn tool geometry and how to grind your own. However, there are some concerns unique to a limber, low power machine that have a direct affect on performance of carbide tools.
Carbide needs speed to work effectively. Carbide tools are generally not as sharp as HSS so they generate more heat at the cutting point (which is fine because they can tolerate this heat - but it takes more power and the forces on the tool are greater). Carbide tools also work best when taking a heavy cut. The high speed with heavy cut makes them very effective in industry, along with the ease of changing inserts without needing to change the setup.
Taking a heavy cut at high speed with a moderately sharp tool may be beyond the capability of a minilathe based simply on lack of power. Further, the minilathe is fairly limber so it is prone to chatter, where higher cutting forces and heavy cuts tend to excite chatter causing a rapidly varying chip load. And carbide often doesn't tolerate this varying chip load well, resulting in chipping of the cutting edge. Chatter is especially common on new machines (which haven't been "tuned") and with new users who are learning how to position the slides, etc. for minimum chatter.
A common complaint when using carbide is poor surface finish. Generally, this is a combination of slower than optimum speed, less than optimum depth of cut and possibly some chipping of the cutting edge from previous chatter as well as less than optimum positioning of the slides for chatter reduction. Carbide inserts are available in a bewildering assortment of grades and coatings so the HSM may be using the inserts he has on hand rather than the optimum insert for the material and task being undertaken.
Some inserts include a chip breaker and usually there is a flat area between the cutting edge and the chip breaker (unlike a HSS tool where the chip breaker generally goes right up to the edge). The flat area on the insert is not meant to contact the chip; when speed is high enough and feed is adequate, the chip flows directly into the chip breaker groove without touching the flat area. When speed and/or feed is lower than optimum the chip may hit the flat area and wear it away - look closely at an insert used in a 7x machine and you'll often see a little crater from this. This often leads to poor surface finish and early breakdown of the insert edge.
Resharpening carbide tools and inserts is possible but seldom undertaken in the home shop because carbide dust is toxic plus a diamond wheel is needed for best results. In addition, the thin edges and high rake needed to lower cutting forces and improve surface finish lead to rapid failure in carbide.
Standard texts describing HSS tool shapes often lead to somewhat similar problems with surface finish, probably because they were written by machinists who were using powerful, rigid lathes before carbide was available. It is possible for new users to successfully grind HSS tools that work well using a simple jig - no knowledge of tool angles needed and these tools are useful to both novices and experienced machinists.
Some HSM's have adopted carbide and love it. Several have written to me because I noted here that my experience was mixed - I use carbide when cutting stainless steel, hardened steel or material with hard inclusions (where HSS is instantly dulled). Using the tangential toolholder with its high rake made me a believer in using high rake on minilathe tooling. It is possible to grind high rake tools by including a chip breaker on regular tool shapes. Ain't no free lunch, of course; high rake tooling tends to wear slightly faster in exchange for better surface finish and lower cutting forces. Another strength of the tangential (besides high rake) is the ease and speed of re-sharpening using the sharpening fixture.
The Rockwell works well with carbide, in contrast to the 7x12. It is more rigid than the minilathe and it has enough power to take fairly heavy cuts at reasonable speeds - the conditions outlined above for using carbide. In particular, 316 SS wears HSS tools out in short order unless speed is restricted but carbide cuts it rapidly without a problem.
I've read a number of books on machining and find some much better than others. As a beginner I found "The Amateur's Lathe" by L.H. Sparey the one I used the most and I still refer to it.
For general reference I like "Model Engineers Handbook" by Tubal Cain; it has information on a broad variety of subjects of interest to HSM's.
The best book of tooling projects I've found is "Model Engineer's Workshop Manual" by George Thomas. I've built several including his retracting toolholder and a version of his dial lock.
"Screwcutting in the Lathe" by Martin Cleeve is well written and a surprisingly useful book. The sharpener for threading bits is useful for other lathe tools and using round HSS mounted in mild steel holders has much to recommend it. There is much information on threading, of course, including the design for a rapid retract attachment, helpful when threading. Plus a nice design for boring bars useful for threading or general boring.
The statistics for my site are surprising because the most popular item is the ball cutter. I suppose I shouldn't be surprised, after all I built it as one of my early projects. However, based on my modest experience gained since I would rank a few mods as more useful than others, where the cost/effort vs benefit may well be different for other owners. For what it is worth, here are my thoughts on some of the mods I've tried. This short list is in order by usefulness and is not a suggested order of implementation -- in some cases it takes some experience (in my case gained by making other, simpler, mods) or special tooling to accomplish a mod.
The most useful mod (and the most expensive) was adding the QCTP. This took more time and effort than originally expected because I changed the compound slide base (JWE mod) and then added additional cross slide travel (and a ball bearing) to complete the mod. The ability to quickly change tools affects ease of use in many ways. Adding more tool holders, especially having the DTI, tangential and knurler mounted and ready to go is a big help but really needs a mill for implementation.
The camlock gets high marks in my shop for usefulness, particularly because it is quickly and easily made from scrap. The carriage lock is similar in usefulness vs cost/effort. If you do much threading then the carriage auto-stop is well worth the modest effort it entails.
Most all the mini-mods are worthwhile from a cost/benefit standpoint, especially the way wiper and way protector.
Lathe alignment is a low cost mod with clear benefits. It isn't really difficult to do but can be intimidating the first time around.
Once these mods are done the mini-lathe should be working to its capabilities and ready for other mods with less general benefits, like the ball cutter.
My minilathe's controller failed about 2 months after purchase - no warning, the fuse just popped at turnon. Homier quickly dispatched a new controller but I couldn't wait so I got out my ohmmeter and determined that one of the FET's had failed. There is no way to tell which of the parallel FET's was failed before removal but as a firm believer in Murphy's Law, it had to be the one which was hardest to remove, so I pulled that one. Sure enough, that was it. The machine has been running over 15 years now on one FET with no problems - the replacement controller sits on a shelf waiting its turn.
My controller, shown here with its one FET, is a surface mount board; there are a number of variations to the physical layout of these controllers but the basic design is similar in all: a PWM controls power to the DC motor. Notice the holes drilled in the bottom of the cover to provide air flow.
In my haste to get my controller repaired (and not knowing how long it would take Homier to ship a replacement) I ordered several IRFP460 FETs and 3.15A fuses which are gathering dust - if $8 for 2 FETs and 2 fuses, mailed in US (Whatta Deal!) seems fair, Contact me.
I have visited and drawn knowledge and inspiration from many lathe and machinist sites on the web, too many to include them all here. I find I return to a some sites repeatedly so a few of these are listed (in random order) along with some sites which have provided underlying ideas for modifications and gadgets I have made, intend to make, or wish I had the skill and energy to make.
This site has about 250 visitors per day in summer and 350/day in winter; about 1/4 are returning visitors. Bandwidth is over 2Gb/month. Most pictures are progressive JPG so they may appear slightly blurry initially but get sharper as the complete image arrives.
This simple website was developed originally using 1stPage 2000 by EVRSoft. The CSS was written with TopStyle Lite, a free CSS editor. The small amount of CSS used has made the HTML much easier to maintain. The site image is kept on my disk and updated onto the server using FTP. Links are validated occasionally using Xenu.
In July 2008 I changed to the TopStyle editor to simplify maintaining compliance with HTML standards. In November 2012 I moved to Win8 where Topstyle 3.5 didn't work well. So in March 2013 I changed to Arachnophilia - a free XHTML editor and FTP xfer program written in Java. The site transitioned to XHTML 1.0 in March 2013. Pages on this site are checked using the W3C XHTML Validator web utility to verify conformance to XHTML 1.0. This site should render well with modern browsers which support HTML and CSS.
This site is checked using Firefox (my normal browser) with text size set to "Larger" and the display set to 1920 x 1080, 16 bit color. Although it should render properly with other settings, it will look to you as it does to me if your system is set up the same way.
In September 2018 I changed to Javascript from SSI to provide the "last modified" information on each page; done because the SSI didn't work on the new host. I wrote a JavaScript to randomly select the first picture on the main page and make clicking the picture bring up the associated page (refreshing the main page brings up a new picture). I have encoded my email address with JavaScript so you'll need JS enabled to contact me. In September 2018 I changed hosts and began using a shared SSL certificate so the site is now secure.
Items on the main page are in chronological order. If you look carefully at the background of pictures you can follow the progression of changes made to my minilathe; I didn't plan this, it is just a natural consequence of making many changes to a very small machine.
Visitors may link their sites to any page desired without prior permission but please do not link directly to the photos. All material on this site is Copyright © 2026 by John Moran, All Rights Reserved.
I monitor statistics for my site and this scheme uses tracking cookies to identify returning visitors (if you consider tracking cookies a problem then simply disable them). When I see many revisits to a page I check the text and adjust it as needed to clarify.
Some visitors check my site periodically to follow my adventures and I've had several requests to include some info on what's been added recently; this section does that in a limited way. I fiddle with various existing pages and I'll try to provide links to the pages whose content is modified (without detailing the mods) plus I'll note new pages as they are added. Ancient tweaks will be dropped from this list. Each page on the site shows the date of its most recent change at the top of the page. (I occasionally fiddle the XHTML without changing the machining content; this affects the file date but won't be noted here.)
Links to Recent Tweaks and Additions
NOTE: There is a SCAM which makes it appear that I have sent a charge for goods supplied. I have not sent a charge to anyone and therefore have no way to rescind any charge. Please check with your bank and follow the money.
To contact me: This one works, others just bring you here.
If the mail link above doesn't work then check the following. I've encoded my mail link with JavaScript to reduce SPAM so you must allow JS to contact me. (If your mail program doesn't work from the link, hovering over it should cause your browser to show the decoded address and subject, allowing you to type it in.) I generally answer emails within a day (usually less) so if you don't get a response, try again.
Last Modified on by John Moran, tyro machinist and XHTML tweaker.