* GadgetBuilder.com * © 2014 John Moran
Last Modified:


An ER-32 collet chuck has been on my list of things to build since I purchased an ER32 collet set with an MT3 adapter - this was used less than expected because it didn't allow work to pass through into the spindle plus the collets had excess runout.
My cousin gave me a nice piece of 3" round 316 SS so this was the raw material used. 316 SS is attractive material but like many stainless types doesn't conduct heat well which makes it more difficult to work on a small machine. This showed up first when I cut the 1.8" long section from the round; the band saw had to rest twice to cool the motor.
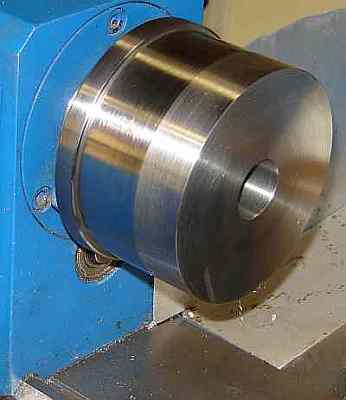
The end and OD were trued and a recess added to mate with the spindle - this could be done on the 7X12 with the 4 jaw but it was faster and easier to use the Rockwell's 3 jaw. I made the recess 16 thou over size because my eBay collet set has up to 8 thou runout on some collets; my intention is to use the Bump-Tru scheme to accommodate this runout.
Locating the holes for the three bolts was interesting because there was a recent (March '09) discussion on the 7x12 group about methods for this. I've done this previously but hadn't thought much about how I did it so this time I paid attention. Since the recess and OD differ from the 3 jaw I couldn't simply measure and copy. Using calipers I measured the OD of the chuck and the OD of a M6.1 stud, then measured from the chuck OD to the inside of a stud. This info allows calculating the bolt circle diameter. Given the bolt circle diameter I calculated the distance from the 2.995" blank's OD (after truing), put a dot of sharpie on the rear rim of the blank and scribed a line in the sharpie that distance from the OD. I carefully made a dot on the line with a scriber, then picked that up by feel with the center punch(more accurate than trying to center punch on the line directly). I then measured between the outsides of two studs and subtracted one stud diameter to find the distance between studs (2.25"). I set the calipers to 2.25", put one caliper tip in the center pop, noted where the caliper would scribe the other holes, put a dot of sharpie there, and then scribed the sharpie marks with the caliper tip (scribing ink marks hasn't affected my calipers and it is really convenient). Then I reset the calipers to the distance from OD to stud center and scribed crossing lines to locate the other two studs. Cross checked by verifying these two were exactly 2.25" apart, then center punched as before. I start drilling from center pops with a 1/16" drill so it can automatically find the mark. Results seem fine: I can bump the chuck in any direction for the needed amount.
The blank was mounted on the 7x12 spindle and the OD trued within 2 tenths by bumping; surface noise prevented getting closer. It took hours to remove the excess material from the blank. I'm not a fan of carbide on the 7x machines because chatter tends to chip the carbide fairly quickly. However, 316 SS eats cobalt HSS and even cast HSS because of high temperatures at the cutting point. So, I used brazed carbide to take 40 thou per pass on 3" diameter SS. This is near the limit for my 7x12 because eventually the work gets so hot that it steams when I cool it with water on a paper towel. Which happens about the same time the motor gets too hot to hold your finger on (so I give it a rest). Feed was touchy: too slow and it chatters, too fast and it stalls.
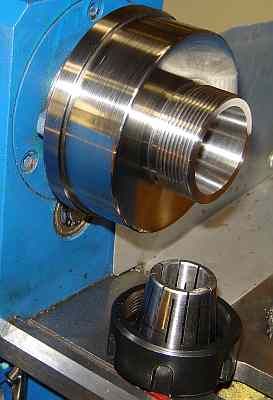
Once the nose was at the required OD, the runout groove was cut and then the nose was threaded M1.5. The dog clutch worked well for this metric thread but I couldn't use the retracting toolholder because the shoulder was too close.
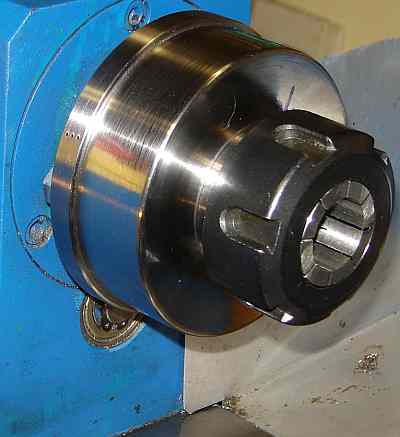 The blank was removed and the MT3 to ER-32 adapter was installed so the DTI could be used to set the compound's angle accurately by reference to it. The blank was reinstalled and trued, then the ER-32 taper was bored. Brazed carbide boring bars worked well but only allowed 5 thou per pass; boring always seems to be limited by flexibility of the boring bar. Heat wasn't a problem here because the limited depth of cut didn't generate so much heat. I recently read "Design and Use of Cutting Tools" by St. Clair and this was a big help in shaping and sharpening these brazed carbide boring bars - his suggestions work particularly well for carbide. Still, I stopped twice to hone the tool so 316 SS is definitely tough stuff to machine on the 7x12.
The resulting chuck seems reasonable. Runout on the interior is under a tenth, basically surface noise. Runout of work held in a collet isn't great because of runout from the collet itself; loosening the studs and bumping the chuck allows improving runout as much as surface noise and my patience allows. If runout changes each time a collet is tightened I may need a better set of collets.
If you have a comment on my site, click here scroll down and click again.