* GadgetBuilder.com * © 2016 by John Moran
Last Modified:
Click to Enlarge
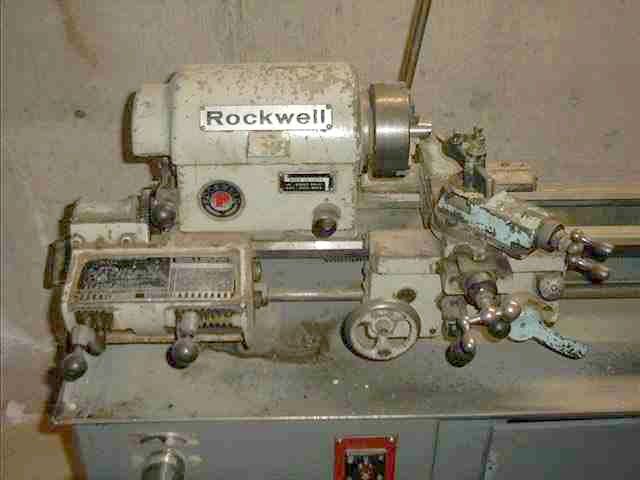
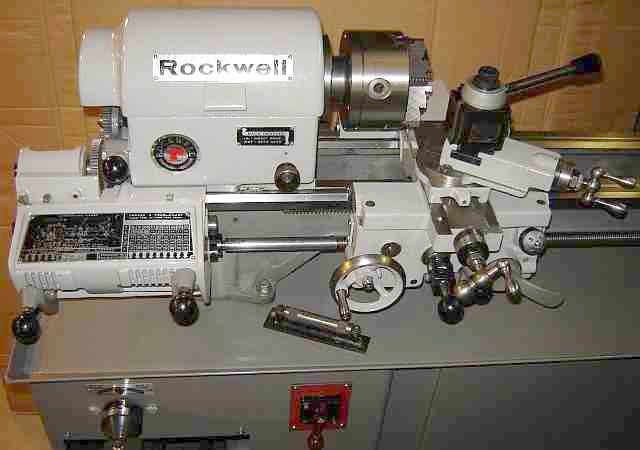
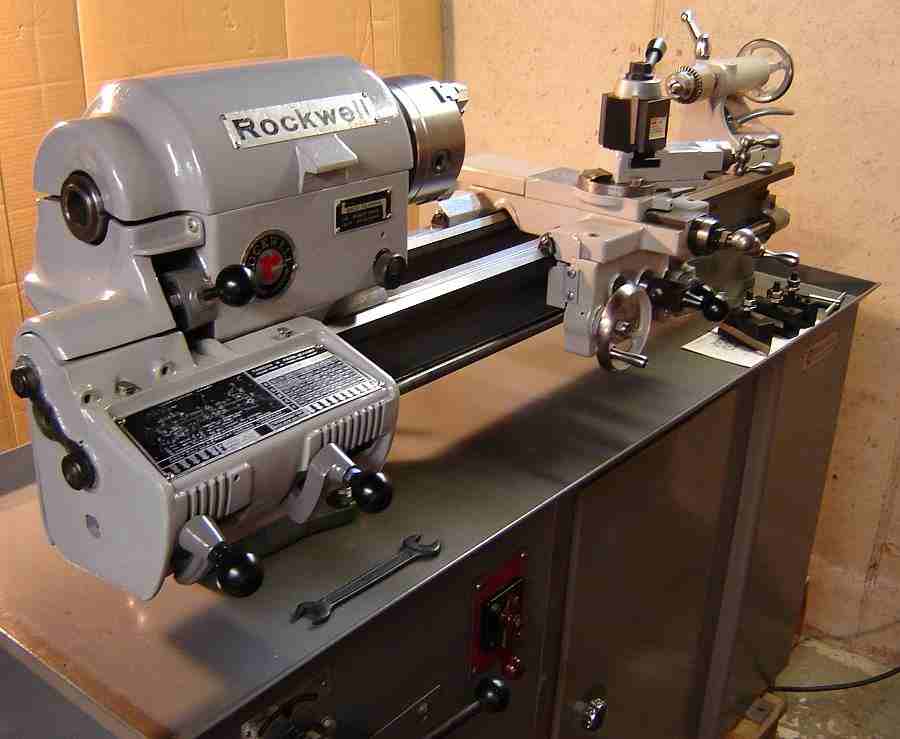
In late March 2007 I purchased a Rockwell 10" metal lathe which was in rough shape . The pictures above show the lathe from the same perspective before and after painting. I visited it twice before purchase so I had some idea of the condition. Unfortunately, I underestimated the work involved in cleaning and painting; in retrospect, I probably should have been more patient and found a machine in better condition. However, it was only 25 miles away and it was available...
This Rockwell lathe was manufactured in the 1970's and was used for shop classes in Newington,CT schools until the program was closed down. The students were more than careless, maintenance was neglected, and the machine was located near woodworking equipment so it was in truly sad shape when I bought it 3rd hand. I broke it down into major chunks and cleaned some of the sawdust out in my garage. Then, an engine hoist and some help from my wife got it into my basement shop where cleaning and painting got underway.
The original colors were dark gray for the cabinet and bed, tan for the lathe. I visited Tractor Supply and purchased "Implement Paint" in Ferguson Gray and Ford Gray as well as hardener to speed drying and increase final hardness. The contrast between these colors was more than desired so I swapped a little between the two until the contrast was more pleasant. This enamel comes in quarts and gallons -- I bought a quart of each and used less than half so I expect to be painting all my gadgets gray for the foreseeable future. This is nice paint, it brushes or rolls on easily and the brush marks flow out nicely. The foam roller left a very slight orange peel finish on the cabinet. It remains to be seen how the paint holds up over time, of course, but it looks good so far.
My shop is small and doesn't have a lot of bench space so the various sections were kept in boxes on the floor and one box at a time moved to the bench. I mixed hardener with small batches of paint so I could paint one or two small items at a time; these items were hung from the ceiling to dry and then hung here and there in the shop to let the paint fully harden - this scattering is apparent in the background of some pictures.
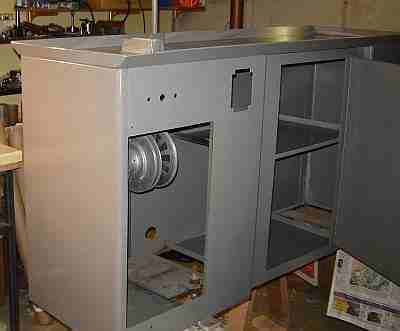 One reason I chose the Rockwell is that it has a variable speed drive - I didn't want to give up variable speed because I found it very useful on the 7x12. The Rockwell uses this Reeves Drive to vary the speed mechanically rather than electrically as in the 7x12. I removed the motor from the cabinet but left the Reeves Drive in place - it was in good condition, needing only cleaning, lubrication, and new belts. The cabinet had some light rust in spots and lots of oil, sawdust, and dirt. Oil and dirt was removed with mineral spirits then the mineral spirits were removed with gasoline. Painting the cabinet with a small foam roller was surprisingly quick and easy. The picture shows it up on horses with its new coat of paint.
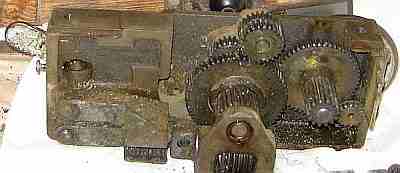 The apron is a good example of what 35 years accumulation of dirt looks like. The apron was dismantled and cleaned, painted, and reassembled. The bronze gear is a common wear point but fortunately this one is still in decent shape - it is apparently tricky to make a replacement. Here are the apron parts, cleaned and ready for paint.
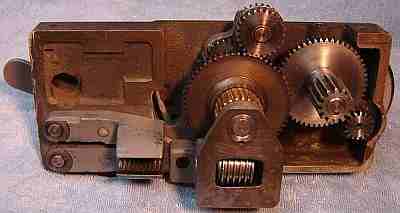 Here is the Rockwell apron clean and back together; clearly it needed the attention. The oil bath for the worm and the large gear leaked when assembled; it is machined flat but doesn't use a gasket so I added a smear of RTV in lieu of a gasket to stop the leak. The leadscrew that drives the worm had oil/sawdust/swarf packed into the thread and mineral spirits wouldn't remove it unless soaked long term. I didn't have a 3 foot container so I spent 2 hours digging the dirt out and then scrubbing with a toothbrush and mineral spirits.
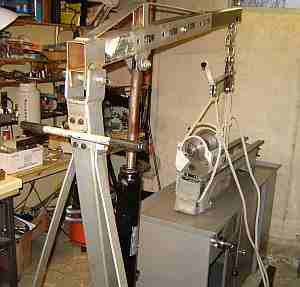 After painting the cabinet I cleaned the lathe bed and headstock. Paint on the bed was in reasonable condition so I opted not to paint it except the end under the gears where some attention was needed, as seen here. The bed was put back onto the cabinet prior to painting the headstock and the end of the bed; the engine hoist earned its keep again here. The bed and headstock weigh 150+ pounds and the little "chimney" in the cabinet that the belts pass through is a tight fit so it would be difficult to place the bed by hand without scratching the cabinet paint.
In addressing mechanical issues with the lathe, a manual is a valuable item. I purchased the manual on a copy-protected CD and printed a copy from that for shop use. This is an excellent scan of the original manual so a printed copy is as good as a new manual. The manual contains adjustment procedures as well as parts diagrams. A copy of the original manual was recently placed in the files of the Rockwell Group, not as clear a copy as the one I bought but the price is right.
 Before and after pictures of the gears on the left end. The tumble reverse gear was "missing" according to the seller but I found it lodged in the gears below during my second inspection. The seller had the shaft so it is hard to say how the gear fell into the works and wasn't noticed. I found that the shafts for both tumble reverse gears were too short by about 5 thou so I added shim washers to eliminate binding; the shafts are hardened so it wasn't possible to turn the head down to get the extra length needed. A manufacturing defect from long ago???
The pulley on the motor is two pieces so the width can be adjusted. The threaded hole for the setscrew had a burr which prevented the screw from going through and contacting the flat on the other part of the pulley. This resulted in some minor damage to that part. I used a tap to clean up the setscrew hole and it then worked fine. Another antique manufacturing defect...

 The gearbox had been worked on previously by someone who, fortunately, didn't damage anything permanently. They replaced the bearings on a shaft and failed to drill out the oil hole in the bearing on one end plus left the other bearing too long by 1/16". In addition, they apparently had some difficulty re-assembling the gear set for the right selector - and so did I initially. A long key is needed and this key can't pass through the bearings so the gears and key must be positioned and the shaft slid into place. The space is just wide enough for the gears and key so the puzzle is how to keep the gears in place on the key while getting the shaft through. After a couple failures trying to install them I understood why the earlier worker shortened the key - he must have installed the gears by slipping them past the end of the shortened key - the problem was that one gear on the end would intermittently spin on the shaft. I made a "tool" from a round a little shorter than the correct length key with a diameter large enough to prevent the key from dis-engaging from the gears. The gears, with the correct length key and this tool in place, were installed without difficulty; the tool popped out the end as the shaft slid through.
The spinner handle on the carriage handwheel was missing - it is amazing how difficult it is to use a lathe without this! I made a handle from stainless, a simple one that doesn't rotate on the shaft but it is smooth enough that it isn't an issue.
The Fwd/Rev lever wouldn't lock in place initially so I suspected the casting was stripped. The problem was that the bolt was shorter than prescribed in the manual so replacing the bolt solved that problem quickly and easily.
The leadscrew has a shear pin on the left end to reduce the chance of damage from a crash while threading or auto feeding. A section of a finish nail had been substituted so I turned a replacement shear pin from mild steel per the plans in the manual. I thought this was a nifty way for the Rockwell factory to ensure that replacement shear pins are always easily available.
The original 3 jaw chuck wouldn't grip properly and appeared to be sprung or worn out, I don't have the experience to judge this. I purchased a new 5" 3 jaw Bison chuck for $100. This works surprisingly well, runout is under 1 thou. This is my first exposure to threaded chucks and I expected more runout than this.
All four V belts were original and in poor condition so all were replaced. The upper belts on my machine are 4L300. I used 4L355 for the lower belts but slightly longer would be better - my motor hold down is at the upper limit. My motor is the original Rockwell 3/4 HP single phase. Belts now are more precisely made than they were years ago so there is no need for matched pairs, just use two of the same size made by one company. I used belts from AutoZone and they work fine for me.
I added a wedge type AXA QCTP because I'm used to a QCTP on my 7x12; I wanted to try the wedge type so when I found one for the same price as the piston type the choice was easy. So far, I haven't noticed much difference from the piston type except one must be more precise when installing the tool holders.
I purchased a used 6" 4 jaw chuck on eBay for $40, cheap because it has one pinion (?) where the socket for the wrench cracked at a corner. I believe I can make a replacement with modest effort (said the eternal optimist :-) Update: I spot welded the cracked corners with my new MIG welder and then spent an hour cleaning up the excess weld (my technique left a bit to be desired) and the chuck seems to work OK now.
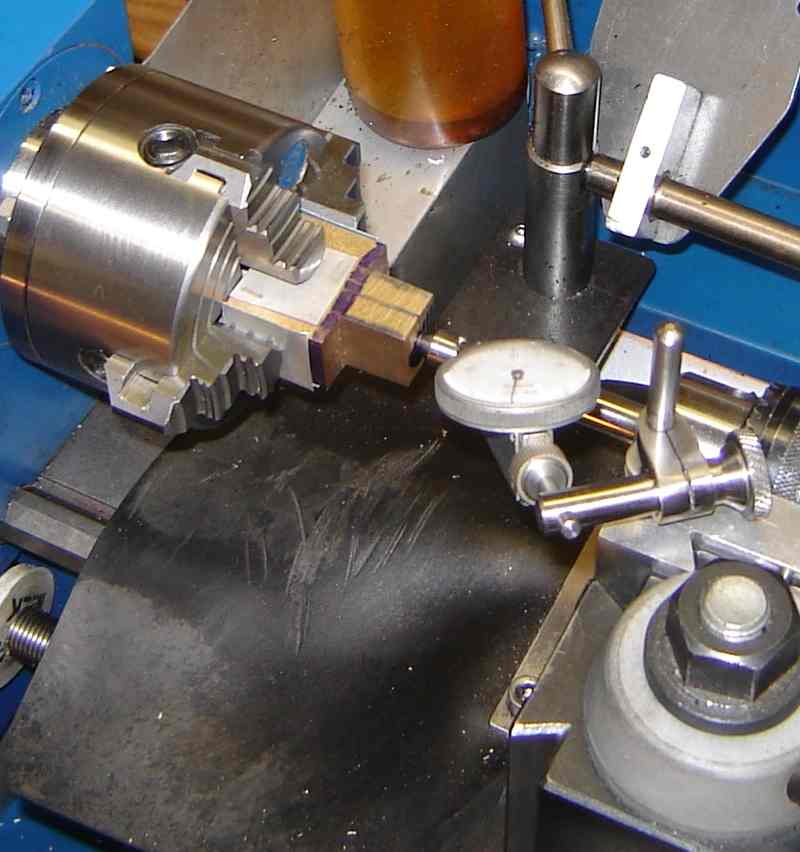 The cross slide had 50 thou backlash. Both the CS leadscrew and nut were worn although still workable. Surprisingly, the compound backlash is only 3 thou.
In July '08 I replaced the CS leadnut by purchasing a blank (with the acme thread completed) from CNSmachine. This was a rectangular block of aluminum bronze which I machined to add the round section to fit the Rockwell CS. The picture shows the blank - after removing the bulk of the material with the bandsaw - being aligned to turn the top section. Completing the nut's top was straightforward working from the drawing on the Rockwell-Lathe Group, although it requires some care to get a good fit. I used the 7x12 for this task so the Rockwell CS remained available to test the fit. Results were better than expected: backlash is now 5-10 thou depending on where the nut is on the worn leadscrew. While this is acceptable I eventually replaced the leadscrew also - to avoid wearing the new leadnut to a peculiar profile. supplied the nut blank for far less than the cost of a LH Acme tap, making the decision to purchase easy.
In August '09 I replaced the CS leadscrew by cutting off the old Acme thread and installing a new section of purchased Acme rod. 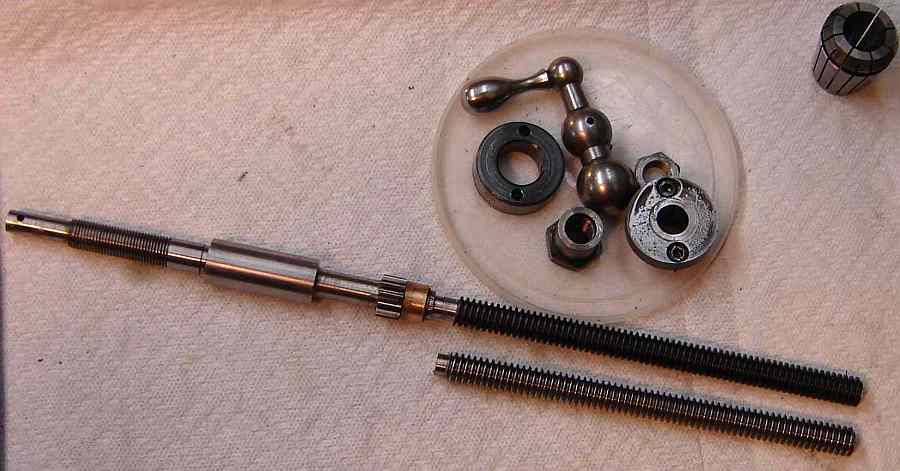 The end of the new threaded rod was turned down and the other end center drilled. The worn thread was parted off and the end was drilled out to 0.270; the new threaded rod was turned to match for a length of 1.25" and Loctite applied. The LS was gripped in the chuck and a center in the tailstock was used along with the center drilled end of the Acme rod to hold things together and aligned while the Loctite set. Result: backlash is now under 3 thou.
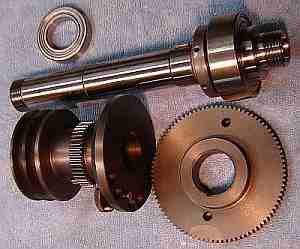 The headstock bearings were slightly "notchy" feeling so I added a few drops of oil and the notchiness disappeared. Both bearings are shielded so, according to my bearing book, the grease cannot be replaced. As a certified cheapskate, I figured it was worth a try so I soaked them in gasoline for a couple of days and spent about 2 hours on each bearing, spinning it in the gas then pulling it out so the gas drained. Periodically I'd filter the gas to remove the chunks of grease, repeating until no more appeared. After this rinse and repeat treatment the bearings spun freely but made a sort of hissing noise. I inserted grease using a glass syringe - the Mobil SHC grease is soft enough to pass through the needle although it takes a while - about a half hour per bearing. Even after adding grease they made the hissing noise but about 2 minutes run time in the headstock eliminated the hissing. While this rough approach may not last, it was modest cost and straight forward to do.
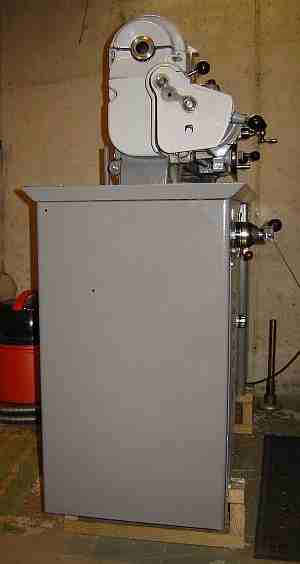 The height of the lathe was much too low for comfort so I made wood blocks to raise it 6.5", making it a much more convenient height. I was concerned that this setup would be unstable so I was prepared to lag bolt the cabinet to the blocks but this wasn't necessary. I purchased a Starrett machinist level at the local flea market to level the bed using the neat jacks built into the lathe feet - this was quick and easy: just watch the level and dial it in, took about 10 minutes.
I initially did a quick check of headstock alignment using RDM and eventually used RDM to improve the horizontal (much easier than shimming as in the 7x12). It took about 1/3 of a turn on the rear tailstock jacking screw to align it.
Two right angle Gits oilers on the gearbox were missing and have been replaced. Two flush oilers on the tailstock are missing.
The back gear control hit the headstock and took the original paint off so I made a spacer of black Delrin that slips over the shaft to avoid damage to my new paint. Update: the back gear backlash adjustment was grossly mis-adjusted; when this was set properly the spacer was no longer needed. Back gear makes a rattling noise under heavy load so further work is needed to address that.
While some issues remain, the lathe is now usable and presentable, as seen below.
In dismantling and assembling the lathe I noted and fixed the two items mentioned above as possible manufacturing defects. There were a couple other puzzling or surprising things noted.
The selector assemblies in the gearbox have little wells in the top; the selectors are moved to the outermost position when oiling the gearbox so that oil inserted via the Gits oilers fills these wells. These wells apparently lubricate the needle bearing in the selector but I found one well had a hole from the well to this bearing while the other selector did not. My experience with needle bearings is that they are grease lubricated rather than oil lubricated and they did have grease initially. So, I repacked them with grease and will avoid filling the wells with oil.
Most of the bronze bearings in the gearbox have an oil hole but there are a couple that don't. Hard to say whether I should add oil holes or just oil the end of the shaft and assume capillary action will get oil to the whole bearing. I'll oil the end of the shaft for now and see how it works out.
The gear box shaft that was tricky to insert, as pictured above, has a ball oiler in the end. This is in the middle of the gearbox so it isn't possible to depress the ball with my regular pressure oil can. Plus, it isn't obvious from the oiling chart that it even exists. I'll probably use a syringe to fill it occasionally. An interesting observation is that the access hole in the end through which this shaft passes as it is inserted is square - surprising since it seems like it would have been so much easier to drill a round hole for access.
The lathe is noisier than I expected. The cabinet seems to resonate and amplify the 60Hz from the motor plus the back gear makes a rattling noise under load; hard to say if these sounds are normal for the Rockwell 10" or the result of problems...
Included with the lathe were several faceplates, lathe dogs, two 1/2" Jacobs chucks with MT2 arbors, an MT2 dead center and a rolling center, a collet drawbar for 4C collets, a lantern toolpost, several tool holders to fit the lantern toolpost, and miscellaneous other items. Most of this tooling is in good, usable condition although a few items are for a different lathe.
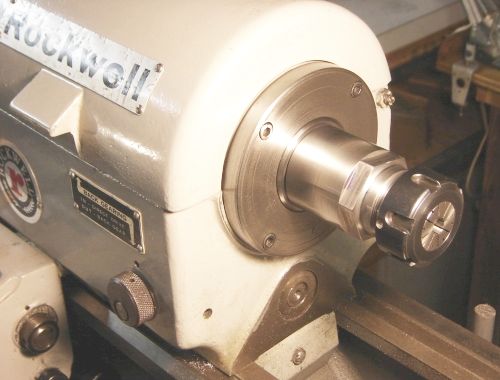 A friend gave me an unfinished prototype for an ER-32 collet chuck to fit the Rockwell's threaded spindle. I finished the 1.5x8 adapter and found it fit nicely with about 5 tenths runout. The 40x1.5 threads for the collet nut weren't quite deep enough so I picked up the thread on the 7x12, taking advantage of the dog clutch's ability to handle metric threads. Once this was done the collet chuck was placed on the Rockwell and the collet taper was enlarged slightly so the collets fit with the proper projection from the chuck. This also trued the chuck so runout is now a tenth or less. This chuck seems to be mild steel, not hardened, but should last a long time in my shop (and the price was right). A similar adapter with less overhang is available from TallGrassTools; easiest to thread M40x1.5 and use a standard nut (available on eBay).
The spindle accepts 4C collets natively but they're rare and expensive plus each collet has a small range. The ER-32 collets are already available in my shop with seamless coverage to 3/4". So the decision to use ER-32's was easy to make.
This page was Last Modified on
by John Moran, XHTML tweaker. If you have a comment on this site or its contents
click here scroll down and click again.